
Tuesday, February 14, 2017
TIPS FOR CARING FOR YOUR LENSES
HERE ARE SOME HELPFUL TIPS FOR CARING FOR YOUR LENSES.1. BUY A UV FILTER
As soon as you get a new lens, immediately buy a UV filter that will fit the front element. These are measured in millimeters. The best ones are multi-coated, which helps to reduce or eliminate flare if light hits the front of the lens.
In the days of film, UV filters blocked ultraviolet waves, preventing images from having a blue color cast. Digital cameras with automatic white balance compensate for this, so really, the only reason to have a UV filter now is to protect the front element of your lens.
Many things can happen to the glass on a lens, from scratches to greasy finger prints. It’s much safer to continually clean a UV filter than to continually clean the front glass on a lens. And if something hits the front of your lens, it’s much better to fix a $40 filter crack than a $1,000 lens. A good UV filter gives me peace of mind that my investment will stay sharp over the long haul.
2. USE PROPER CLEANING SUPPLIES
If you are using your lens outdoors, you will likely accumulate dust on the glass. There are many different cleaning methods for you to try, including brushes, compressed air, lens cloth and lens cleaning fluid, and pre-moistened wipes. All of these are safe to use on your lens and your success really depends on your technique and the quality of the tools.
Do not use any old cloth or a shirt tail. These things can gather small particles that are abrasive to glass and can damage your lens. I prefer to use pre-moistened wipes that are alcohol-based because the liquid evaporates quickly and doesn’t streak. Make a point of cleaning your lens glass periodically and, if the dirt doesn’t build up, it will be an easy task.
Lens Care Equipment Typical cleaning supplies
3. KEEP YOUR EQUIPMENT DRY
Better lenses have some sort of weather seals to keep water and dust out. But with so many moving parts, it’s impossible to waterproof a lens completely. If you plan to be shooting in the rain or in some other situation where there’s a possibility of water damage, look into buying a rain cover, which is basically a plastic bag you put over your camera and around your lens. At the very least, put a lens hood on to keep water off the front element, and if you are in VERY wet situations, consider using an underwater housing for the ultimate protection.
4. USE A LENS HOOD
Speaking of lens hoods, putting one on your lens is an easy way to protect it from unforeseen flying objects or even from setting your camera down too hard. Having a hood on has saved my glass more times than I can count.
5. SEND YOUR LENS IN FOR SERVICE
Trying to take a lens apart to clean it if you are not experienced in that sort of thing is a bad idea. The camera manufacturers have the equipment and skills to take a lens apart and properly clean it. I know that both Canon and Nikon allow you to do this for a reasonable cost, and some independent shops are able to clean, too. Lenses that have been in particularly harsh shooting conditions, like sand, snow or high winds might benefit from a professional servicing.
IT GOES WITHOUT SAYING THAT STORING YOUR LENSES IN A COOL, DRY PLACE WILL EXTEND THEIR LIFE, AS WILL HANDLING THEM CAREFULLY. TRY OUT A FEW DIFFERENT TECHNIQUES FOR CLEANING YOUR LENS AND LET ME KNOW WHICH WORK BEST FOR YOU IN THE COMMENTS.
ESSENTIALS EQUIPMENT FOR WEDDING PHOTOGRAPHY
HESE ARE THE EQUIPMENT ESSENTIALS FOR WEDDING PHOTOGRAPHY
1. CAMERA AND BACKUP CAMERA
I actually bring three cameras so I can shoot with two and have one additional as a backup, but I think only two would get the job done. It is essential to have a backup in the event that something goes wrong with your primary camera -- and there are so many things that can go wrong.
2. MEDIUM ZOOM LENS
I use a 24-70 f2.8 as my medium zoom and the lens that is on my camera most of the time. This focal length is great for wedding portraits and photojournalism, offering both wide and tight perspectives. The pretty wide aperture gives me some flexibility in spaces that aren’t very well lit.
3. TELEPHOTO LENS
You will need a longer lens to capture events from a distance, in particular the ceremony. I like to stand toward the back or sides of a ceremony as to not be blocking anyone’s view and taking photos from a distance with my 70-200mm. I also use this lens for closeups of the first dance.
4. WIDE ANGLE LENS AND PRIME LENSES
These are not as essential for a wedding, but are certainly nice to have. The wide angle can get you shots of architectural details or big groups. The prime lens can allow you to shoot in dark spaces and give you dreamy depth of field.
5. SPEEDLIGHTS
Using an external flash can be a lifesaver when you need to get a shot that is just too dark to get otherwise. I have to use speedlight photography techniques for nighttime weddings and dark churches. The alternative is dark or grainy images.
6. MEMORY CARDS AND BATTERIES
Always bring more cards and batteries than you think you need. I will shoot 50-60 GB of images for a wedding and go through two sets of batteries per camera and per speedlight. Make sure the batteries are all charged up in advance.
7. TRIPOD AND LIGHT STANDS
A good tripod will get you out of a pinch if you are low on light and just need a little more stability. It’s also helpful if you are working in very low light or compositing images together. The light stands are helpful to place your speedlights on and allow you to adjust the placement of the lights. Shoot-through umbrellas are also helpful to have with the lightstands and speedlights for portrait work.
8. FLASH DIFFUSER
I like to bring a Gary Fong Lightsphere to put on top of my flash. It helps to diffuse the light and make for better portraits on the fly when you don’t have time to set up lights.
9. CAMERA BAG
You will need something to put all your gear in. Make sure it’s big enough and comfortable enough to haul around with you as you’re moving throughout the day.
10. STUDIO STROBES AND UMBRELLAS
Some people may disagree with me that this is essential, but I like to have powerful strobes (more power than speedlights) to use on formal portraits if I need them. Sometimes, it rains or is too cold and I’m forced to take formals in a dark church. In this case, I like have the speed and power of strobes to evenly light up a large group of people.
11. LENS CLEANING KIT AND LENS HOODS
It’s possible for the lens to get dirty or wet throughout the course of a quick moving event, so it’s good to keep a cleaning kit or lens wipes with you to keep smudges from ruining your shots. Lens hoods are a good way to keep lenses from getting dirty in the first place and also serve to keep sun flare down. Take a look at our post for 5 tips for caring for your lenses, and ensure that all of your equipment is well-maintained.
In his class, Off-Camera Flash Photography, Neil van Niekerk discusses how to generate the best light for your subject via speedlights, umbrellas and further equipment. His Portraits with On-Camera Speedlight further delves into the importance of creating the best light no matter what kinds of conditions you may be shooting in.
Monday, February 13, 2017
Traditiona Wedding photography In Nepal
Wedding Photography
 The traditional style of wedding photography is Picture the shots that couples used to take before the age of digital cameras. Carefully poses are involved in this photo style which usually don’t leave much room for creativity. You can count on a list of photographs that focuses on the significant parts of the celebration. Think shots after saying “I do” on the wedding with family members, when cutting the cake and so on. This photography style has ordered it and requires the intervention of wedding photographer to get the necessary shots. The traditional style of wedding photography is time oriented, which is the image that makes up wedding portraits.
Photo Position Tips and Tricks for Great Photo
Portrait Photography“Intentions have been conveyed”

Posed portrait means that the photographer has conveyed the intentions to the subject, by words or by action, and there needs to be a change of body position or expression.
CloseUp portrait photography
Portrait Photography“Get it close”

These are the images that are taken from very close, using zoom or macro lens.
Sunday, February 12, 2017
Fewa lake Pokhara Nepal - fishing

Fishing is the activity of trying to catch fish. Fish are normally caught in the wild. Techniques for catching fish include hand gathering, spearing, netting, angling and trapping.
Honey Bee In Nepal and Pokhara
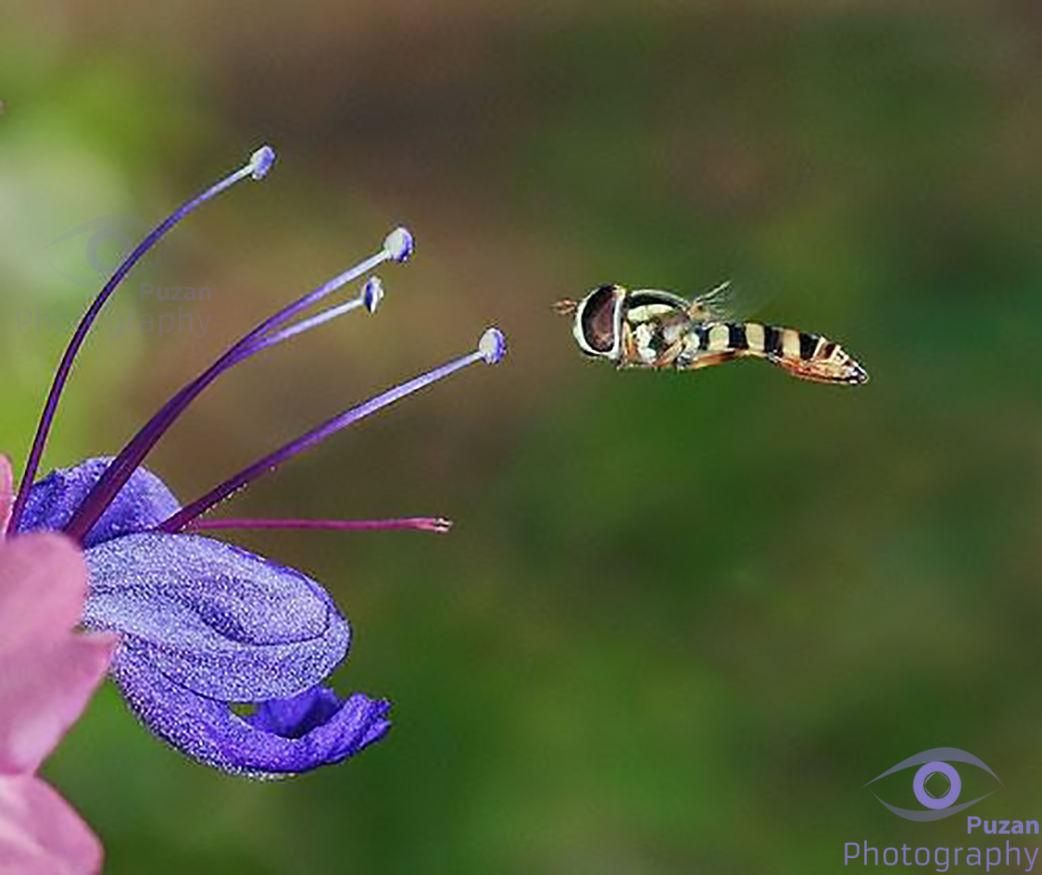
Honeybees are social insects that live in colonies. The hive population consists of a single queen, a few hundred drones, and thousands of worker bees. The honeybees we know and love here at Honeybee Centre forage for nectar and pollen from flowering plants.
What is Paragliding and Paragliding Worldcup in Pokhara Nepal.
Paragliding Pre Worldcup, Pokhara, Nepal 2016

Paragliding is the recreational and competitive adventure sport of flying paragliders: lightweight, free-flying, foot-launched glider aircraft with no rigid primary structure. The pilot sits in a harness suspended below a fabric wing comprising a large number of interconnected baffled cells.
Natural Flower photography In Pokhara
A flower cannot blossom without sunshine, and man cannot live without love.

Friday, January 30, 2015
SUNSET IN NEPAL

Know where to find the sunrise and sunset times
and note how the sky looks at those times
at least once.
Tuesday, January 27, 2015
Begnas-Lake -Pokhara-Nepal

Begnas Lake is a freshwater lake in Lekhnath municipality of Kaski district of Nepal located in the south-east of the Pokhara Valley. The lake is the second largest, after Phewa lake, among the eight lakes in Pokhara Valley.Water level in the lake fluctuates seasonally due to rain, and utilization for irrigation.The water level is regulated through a dam constructed in 1988 on the western outlet stream, Khudi Khola.
From Pokhara, Nepal

Machapuchare, Machhapuchchhre or Machhapuchhre or माछापुच्छ्रे, meaning "fishtail" is a mountain in the Annapurna Himalayas of north central Nepal. It is revered by the local population as particularly sacred to the god Shiva, and hence is off limits to climbing.

Paragliding Pre Worldcup, Pokhara, Nepal
Paragliding Pre Worldcup, Pokhara, Nepal 2016
Paragliding is the recreational and competitive adventure sport of flying paragliders: lightweight, free-flying, foot-launched glider aircraft with no rigid primary structure. The pilot sits in a harness suspended below a fabric wing comprising a large number of interconnected baffled cells.


Monday, January 26, 2015

Friday, December 12, 2014

ABOUT PUZAN PHOTOGRAPHY
I am specialize in wedding photography,event photography,portrait photography and on this website you will find a collection of some of my recent work.
Wednesday, February 12, 2014

Portrait Photography Tips
How do you take Portraits that have the ‘Wow’ factor?
I want to look at some ways to break out of the mold and take striking portraits by breaking (or at least bending) the rules and adding a little randomness into your portrait photography.
1. Alter Your Perspective
Most portraits are taken with the camera at (or around) the eye level of the subject. While this is good common sense – completely changing the angle that you shoot from can give your portrait a real WOW factor.
Get up high and shoot down on your subject or get as close to the ground as you can and shoot up. Either way you’ll be seeing your subject from an angle that is bound to create interest.
 \
\2. Play with Eye Contact
It is amazing how much the direction of your subject’s eyes can impact an image. Most portraits have the subject looking down the lens – something that can create a real sense of connection between a subject and those viewing the image. But there are a couple of other things to try:
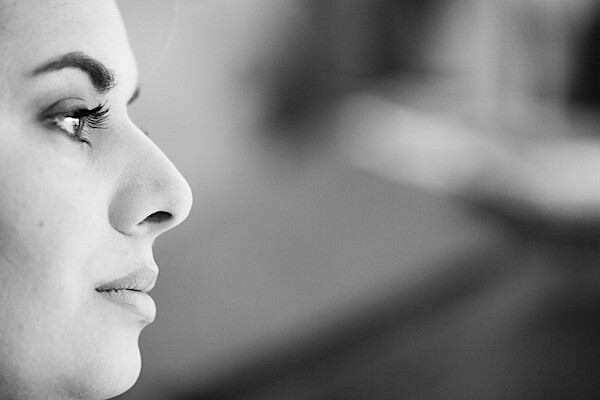
A. Looking off camera – have your subject focus their attention on something unseen and outside the field of view of your camera. This can create a feeling of candidness and also create a little intrigue and interest as the viewer of the shot wonders what they are looking at. This intrigue is particularly drawn about when the subject is showing some kind of emotion (ie ‘what’s making them laugh?’ or ‘what is making them look surprised?’). Just be aware that when you have a subject looking out of frame that you can also draw the eye of the viewer of the shot to the edge of the image also – taking them away from the point of interest in your shot – the subject.
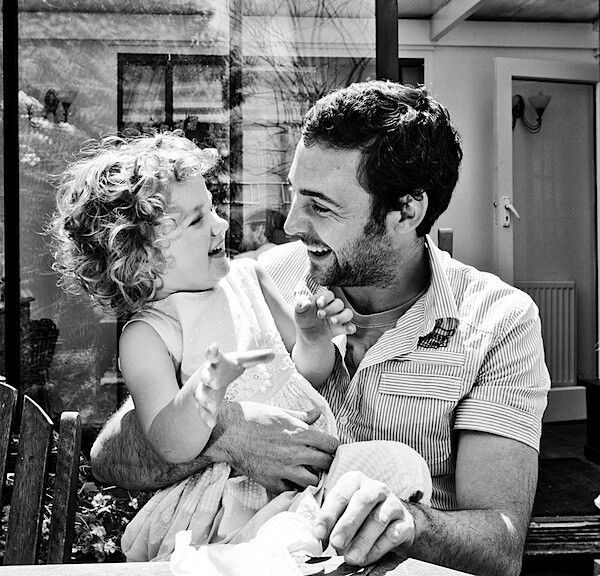
B. Looking within the frame – alternatively you could have your subject looking at something (or someone) within the frame. A child looking at a ball, a woman looking at her new baby, a man looking hungrily at a big plate of pasta…. When you give your subject something to look at that is inside the frame you create a second point of interest and a relationship between it and your primary subject. It also helps create ‘story’ within the image.
3. Break the Rules of Composition
There are a lot of ‘rules’ out there when it comes to composition and I’ve always had a love hate relationship with them. My theory is that while they are useful to know and employ that they are also useful to know so you can purposely break them – as this can lead to eye catching results.
The Rule of Thirds is one that can be effective to break – placing your subject either dead centre can sometimes create a powerful image – or even creative placement with your subject right on the edge of a shot can sometimes create interesting images.
Another ‘rule’ that we often talk about in portrait photography is to give your subject room to look into. This can work really well – but again, sometimes rules are made to be broken.
4. Experiment with Lighting
Another element of randomness that you can introduce to your portraits is the way that you light them. There are almost unlimited possibilities when it comes to using light in portraits.
Side-lighting can create mood, back lighting and silhouetting your subject to hide their features can be powerful.
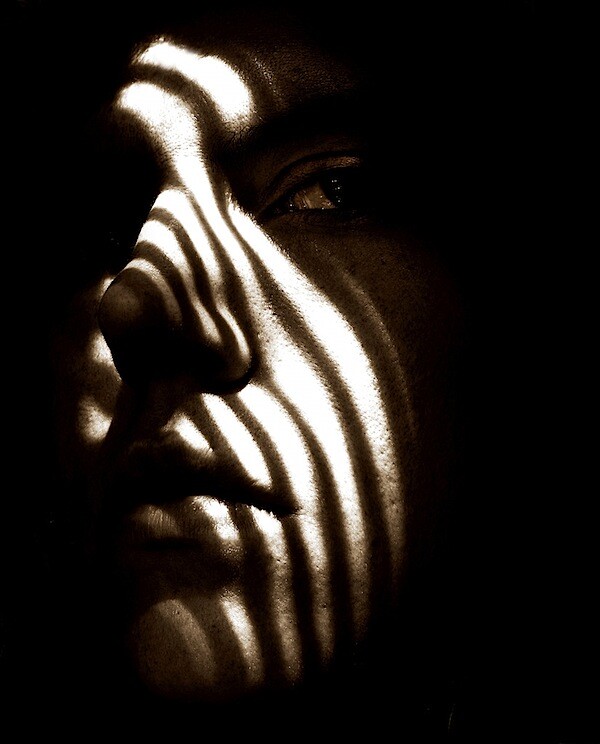
Using techniques like slow synch flash can create an impressive wow factor.

5. Move Your Subject Out of their Comfort Zone
I was chatting with a photographer recently who told me about a corporate portrait shoot that he had done with a business man at his home. They’d taken a lot of head and shoulder shots, shots at his desk, shots in front of framed degrees and other ‘corporate’ type images. They had all turned out fairly standard – but there was nothing that really stood out from the crowd.
The photographer and the subject agreed that there were plenty of usable shots but they wanted to create something ‘special’ and out of the box. The photographer suggested they try some ‘jumping’ shots. The subject was a little hesitant at first but stepped out into the uncomfortable zone and dressed in his suit and tie started jumping!
The shots were amazing, surprising and quite funny. The shoot culminated with the subject jumping in his pool for one last image!
While this might all sound a little ‘silly’ the shots ended up being featured in a magazine spread about the subject. It was the series of out of the box images that convinced the magazine he was someone that they’d want to feature.

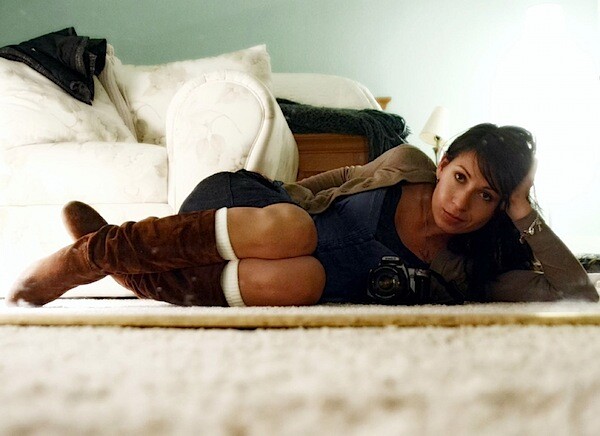
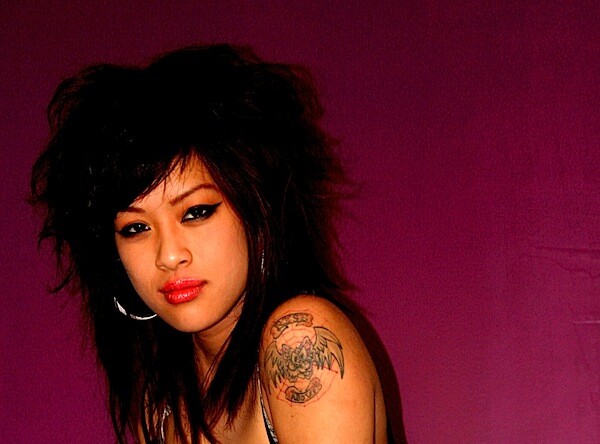
6. Shoot Candidly
Sometimes posed shots can look somewhat…. posed. Some people don’t look good in a posed environment and so switching to a candid type approach can work.
Photograph your subject at work, with family or doing something that they love. This will put them more at ease and you can end up getting some special shots with them reacting naturally to the situation that they are in. You might even want to grab a longer zoom lens to take you out of their immediate zone and get really paparazzi with them.
I find that this can particularly work when photographing children.

7. Introduce a Prop
Add a prop of some kind into your shots and you create another point of interest that can enhance your shot.
Yes you might run the risk of taking too much focus away from your main subject but you could also really add a sense of story and place to the image that takes it in a new direction and gives the person you’re photographing an extra layer of depth that they wouldn’t have had without the prop.

8. Focus Upon One Body Part – Get Close Up
Get a lens with a long focal length attached to your camera – or get right in close so that you can just photograph a part of your subject. Photographing a person’s hands, eyes, mouth or even just their lower body… can leave a lot to the imagination of the viewer of an image.
Sometimes it’s what is left out of an image that says more than what is included.
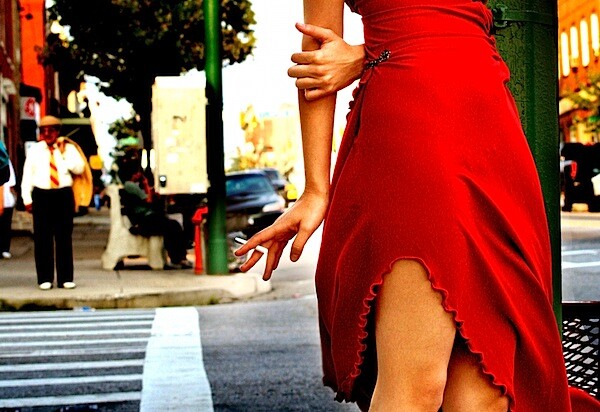
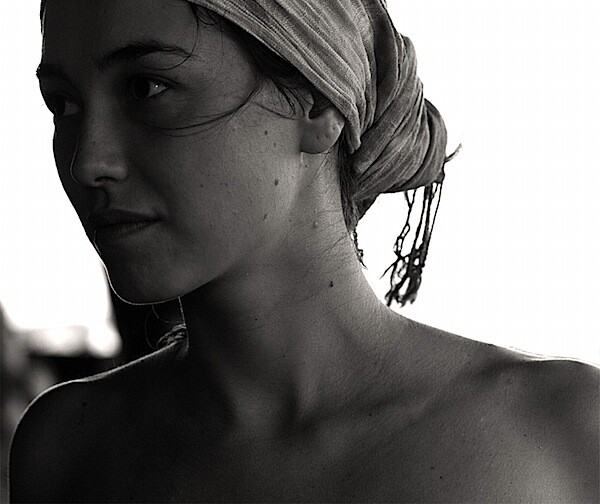
9. Obscure Part of your Subject
A variation on the idea of zooming in on one part of the body is to obscure parts of your portrait subject’s face or body. You can do this with clothing, objects, their hands or just by framing part of them out of the image.
Doing this means that you leave a little to the imagination of the image’s viewer but also focus their attention on parts of your subject that you want them to be focused upon.
10. Take a Series of Shots
Switch your camera into ‘burst’ or ‘continuous shooting’ mode and fire off more than one shot at a time.
In doing this you create a series of images that could be presented together instead of just one static image.
This technique can work very well when you’re photographing children – or really any active subject that is changing their position or pose in quick succession.

Tips for Beginner Photographers
Photography Tips
 1. Don’t go crazy buying the most expensive equipment right away.
It’s possible to get very nice photos with an inexpensive point and shoot. See these examples on Flickr. The more photos you take, the more you’ll know about what kind of camera to get when it’s time to upgrade.2. Consider a tripod.
On the other hand, an inexpensive tripod is worth getting, especially if you have shaky hands like mine. When I got a tripod, my satisfaction with my shots skyrocketed. For even more stability, use your camera’s timer function with a tripod (read our introduction to tripods).3. Keep your camera with you all the time.
Photo ops often come when you least expect it. If you can keep your equipment relatively simple – just a small camera bag and a tripod – you might be able to take advantage of some of those unexpected opportunities. Or, if your phone has a camera, use it to take “notes” on scenes you’d like to return to with your regular camera.4. Make a list of shots you’d like to get.
For those times you can’t carry your camera around, keep a small notebook to jot down places you’d like to come back and photograph. Make sure to note any important details, like the lighting, so you can come back at the same time of day or when the weather’s right. If you don’t want to carry a notebook, send yourself an email using your cell phone with Jott.com.5. Don’t overlook mundane subjects for photography.
You might not see anything interesting to photograph in your living room or your backyard, but try looking at familiar surroundings with fresh eyes. You might catch an interesting trick of the light or find some unexpected wildflowers in your yard. Often a simple subject makes the best shot.6. Enjoy the learning process.
The best part of having a hobby like photography is never running out of things to learn. Inspiration is all around you. Look at everything with the eyes of a photographer and you’ll see opportunities you never noticed before.
7. Take advantage of free resources to learn.
Browse through Flickr or websites like the Digital Photography School Forum for inspiration and tips. Also, your local library probably has a wealth of books on all types of photography. If you’re interested in learning about post-processing, give free software like the GIMP a try.
8. Experiment with your camera’s settings.
Your point and shoot may be more flexible and powerful than you know. Read the manual for help deciphering all those little symbols. As you explore, try shooting your subjects with multiple settings to learn what effects you like. When you’re looking at your photos on a computer, you can check the EXIF data (usually in the file’s properties) to recall the settings you used.9. Learn the basic rules.
The amount of information about photography online can be overwhelming. Start with a few articles on composition. Be open to what more experienced photographers have to say about technique. You have to know the rules before you can break them.10. Take photos regularly.
Try to photograph something every day. If you can’t do that, make sure you take time to practice regularly, so you don’t forget what you’ve learned. An excellent way to motivate yourself is by doing the weekly assignments in the DPS Forum.11. Don’t be afraid to experiment.
If you’re using a digital camera, the cost of errors is free. Go crazy – you might end up with something you like. You’ll certainly learn a lot in the processTop 10 Photography Tips
Photography Tips
1
Compose in Thirds

2
Avoid Camera Shake

Camera shake or blur is something that can plague any photographer and here are some ways to avoid it. First, you need to learn how to hold your camera properly; use both hands, one around the body and one around the lens and hold the camera close to your body for support. Also make sure you are using a shutter speed that matches the lens focal length. So if you’re using a 100mm lens, then your shutter speed should be no lower than 1/100th of a second. Use a tripod or monopod whenever possible. In lieu of this, use a tree or a wall to stabilize the camera
.
3
The Sunny 16 Rule

4
Use a Polarizing Filter

5
Create a Sense of Depth

6
Use Simple Backgrounds

7
Don't Use Flash Indoors

8
Choose the Right ISO

9
Pan to Create Motion

10
Experiment with Shutter Speed


Top 10 Photography Mistakes
Photography TipsThere are certain photography problems and mistakes that commonly occur for new photographers .The good news is that many of these mistakes are easily corrected with a bit of know how.
1
Blurry Pictures
One of the top complaints from amateur photographers is that their images have come out blurry. The simple answer to this problem usually is that there isn’t enough light reaching the sensor, so the camera struggles to take a sharp image. Various ways to solve this issue include using a tripod or a monopod (a must in low light conditions!), choosing a higher ISO setting for faster shutter speeds or using flash to freeze any movement.
2
Too Much Contrast

A photograph with too much contrast has a strong difference between light (highlight) and darker (shadow) areas of the image. This is very apparent in photographs taken on a sunny day. Use flash to fill in the dark shadowy areas of the image and try underexposing the image by one or two stops to see the difference it makes.
3
Red-Eye

Although red-eye can easily be corrected with an image editing software, it’s a great idea to know how to prevent it from occurring. Red-eye appears commonly in light-eyed people when the camera flash reflects off the retinas in their eyes. You can prevent red-eye by avoiding your camera's built-in flash whenever possible, also many cameras have an automatic red-eye reduction mode. Another technique is to have your subject look away from the camera for the photo, in order to avoid the reflection in their eyes. One last trick is if the room can be made brighter to allow maximum light into the subject’s eyes, their pupils will shrink due to the brighter light. Though for most situations, this may not be practical.
4
Off-Colors

Off-colors, or color casts are a well known problem in digital photography. In digital imaging we can use the white balance (WB) settings to deal with this problem. Choose “auto” or the proper WB settings for the scenario. For example, an indoor photograph tends to look orange because the incandescent (tungsten) light bulb emits “warm” or orange light. The tungsten setting devised for this scenario will add blue to balance it out.
5
Less is More

When framing and composing our photograph, we want to create something interesting for the eye but at the same time avoid excessive distractions. Normally, one main focal point or area is enough. If you have a focal point in the background and a distraction (like rocks) in the foreground, crop the image by zooming in to avoid the distracting item. This effect also may be done later with your image editing software. The point is to have a photo where the eye is drawn to the main attraction.
6
Subject is Too Far

In every photograph we shoot, we want something engaging in the frame. If your subject is too far away, it will not make much impact. You can move closer by using a good quality telephoto zoom lens or we can crop the image later with your image editing software. Remember to shoot the image at the highest resolution possible because cropping reduces the quality.
7
Low Resolution

Shooting at a low resolution may allow you to store more images on your memory card, but it is a bad idea. Using a low resolution setting means that the image quality will suffer, and you won’t be able to print large photographs without noticing the pixels. Additionally, every time you save a jpeg file it loses some quality. If you start off with a small file, your editing options will be very limited. Buy additional memory cards and take your photos with higher resolution and avoid low quality files!
8
Too Much Noise

Digital noise is analogous to grain on a film photograph, those unsightly little speckles on your image. The higher the ISO the more noise will appear, and the more you enlarge the image the more you can see noise. Night time images are prone to noise as the camera struggles to record detail. To reduce noise, use the largest image quality setting and always use a tripod so that you can choose the lowest ISO setting without causing blur.
9
Underexposed Pictures

An underexposed image is one that is too dark because there wasn’t enough light reaching the sensor when the image was taken. If you see on your LCD screen that an image looks too shadowy and underexposed, you can try opening the aperture to allow more light in. You can also adjust the exposure on a DSLR, selecting the ‘+’ to add more light, usually in ½ stop increments.
10
Overexposed Pictures

If your photograph is too bright and lacking in detail, then it is overexposed. This means there is too much light hitting the sensor. Overexposure can be particularly bad on bright days or with light colored subjects. To correct for overexposure, you can try underexposing the image by choosing -0.5 or -1 and seeing if more detail has been retained. Additionally, use spot metering for accurate results - pick a grey mid-toned area in your image as the guideline.
Subscribe to:
Posts (Atom)